How To Clean Doc Martens – The Ultimate Dr Martens Care Guide
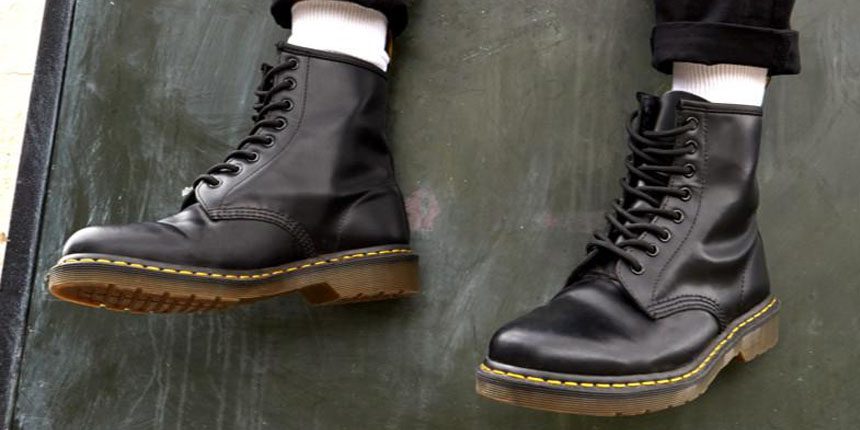
Doc Martens are a classic British footwear icon dating back to 1945, designed to last for decades with the right amount of care and attention. To ensure they have a long lifespan, it’s essential that we all look after our Docs, and the best way to do that is by cleaning them.
Of course, that may seem like a daunting task, but we’re here to guide you through the process. In our experience, cleaning Doc Martens doesn’t have to be a chore, which is why we’ve offered you our help.
If you have a pair of Docs, you might worry that you need to have some specialist cleaner, but all you really need is some regular soapy water. You could even use washing up liquid!
All we need to do is remove the laces, brush off any dirt off your shoes, remove any scuffs, condition the leather, clean the soles, then polish them all off. Once you’ve re-laced them, your Docs will be looking as good as new!
What Do You Need To Clean Doc Martens?
Before we delve into cleaning our Docs, it’s essential we pick up a few items. You’ll need:
- A shoe brush
- Nail polish remover
- Clean cloths
- Leather conditioner
- A toothbrush
- A bowl of warm, soapy water
- Wax-based shoe polish
- Newspaper
- Nylon cloth
If you’re confused about finding a specific type of leather conditioner, don’t worry. We recommend you use either Mink oil or lemon essential oil, as either of these will moisturise and condition your Docs to ensure they remain hydrated.
Much like regular skin, if you don’t moisturise your Docs, they will dry out and crack over the years, which is one of the biggest ways that your Docs will break.

A Step-By-Step Guide To Cleaning Doc Martens
Cleaning is an essential part of keeping your Doc Martens well-kept and durable for years to come.
Therefore this is definitely the most important aspect of our article. Follow our guide closely, and you’ll be able to keep your Docs in pristine condition.
Step 1
First, we need to remove our shoe laces. Remove them from the shows, and use this time to put them in some soapy water.
If you want to replace them, you can take this time to do so. By removing the laces, we can reach even the hard to reach sections of our boots.
Step 2
We need to grab a shoe brush and gently brush away any dried dirt or mud from the Docs. Don’t forget to remove the dirt from the tongue and the stitching too.
If you want the yellow stitching to stand out, grab an old toothbrush and carefully brush the dirt away to ensure that nothing is caught in the thread.
Step 3
Once the dirt is gone, the scuffs on our Docs will be more visible, which is why we have some nail polish remover. Using one of our clean cloths, we’ll apply the nail polish remover to it.
Once we’ve done that, we’ll gently rub at the scuffs until the polish wears away and comes off. When we’re done, we just need to wipe our Docs down with another damp, clean cloth.
It’s essential we don’t rub too hard on them, and ensure that we leave them to air dry.
Step 4
Now that our Docs are dry, it’s time to grab another cloth and apply our leather conditioner to it. Massage the conditioner into the boots and make sure to get even those tough to reach areas.
Once we’ve massaged the conditioner into everywhere we can reach, it’s best to leave the Docs to dry for another 20 minutes.
Step 5
It’s time for the tough part. Fill a bowl with warm water and a dash of washing up liquid. Grab either a shoe brush or a toothbrush and scrub the soles of your Docs to remove anything you’ve ever stepped in.
A toothbrush is best for the hard to reach areas, so that way you can get into the tightest crevices. Once done, we just need to wipe the soles down with a damp cloth.
Step 6
Once our Docs are dry once more, it’s time to get our wax-based polish out. To help choose our polish, we’ve followed Dr. Martens’ recommendations.
We’ve gone with a neutral polish, as it’s best to choose a colour that’s as close to our shoes as possible. Put down some old newspapers and put your Docs on top of them.
Step 7
Now it’s time to apply the polish. Using a smooth cloth, we need to warm the wax by rubbing the cloth in with a circular motion. Once the wax is warmed up, it’ll be much easier to apply.
Gently, but firmly, apply the polish into the leather and use a toothbrush to get to harder to reach areas.
Sometimes, if it’s been a while or we’re polishing older shoes, we’ll apply a second coating to ensure best results. Once done, we’ll let them sit for 10 or 20 minutes.
Step 8
Grabbing our trusty shoe brush, we need to gently buff the leather and polish it. We should be able to work the polish in and remove the excess. This will lead to more basic results, as it will take longer to get a mirror shine result.
Step 9
Now that the excess polish is gone, we need to use our nylon to remove any lingering dust and polish. Once we’ve done this, they’ll be good as new.

Three Places To Purchase Dr. Martens
We recommend the following retailers for New Release and Sale Docs.
Tower London SHOP HERE
Schuh SHOP HERE
all sole SHOP HERE
Final Thoughts
As you can see, cleaning Doc Martens doesn’t have to be a challenge. In fact, it’s a simple process that we recommend repeating every three months.
Cleaning them every three months will ensure they stay in the best condition, and we’ve found that they last for a lot longer. Once you’ve got the hang of cleaning them, it should become second nature.
Looking after Doc Martens is essential to keeping them looking great, especially as they’re made from leather. Leather boots can crack easily when they’re not being maintained, so make sure you look after them!